
I used to attack grout with a brush the second I spotted those dark specks, and they would still creep back after a couple showers.What changed was letting the cleaner sit long enough to do the work, then doing a quick scrub and drying the area like it is the last step, not an afterthought.Now I run the fan a little longer and squeegee the tile, and the grout stays brighter between deep cleans.
Mildew in tile grout usually shows up as dark specks, dingy lines, or pinkish staining that creeps back after a few showers. It is frustrating because grout is porous, so it holds moisture and grime. The fix is a mix of the right treatment, the right dwell time, and better drying habits afterward.
What mildew in grout is (and why it happens)
Mildew vs. mold: does it matter?
In everyday cleaning, people use “mildew” and “mold” interchangeably, especially for bathroom growth on grout. Mildew is often the lighter, surface-level growth; mold can be darker and more stubborn. Either way, the cleaning approach is similar: remove surface soap scum first, then treat the growth, then dry the area thoroughly.
Why grout attracts mildew
- Grout is porous, especially cement-based grout, so it absorbs water.
- Soap scum and body oils feed growth and trap moisture.
- Slow drying from poor ventilation or a frequently used shower keeps grout damp.
- Old or unsealed grout holds moisture longer and stains more easily.
Before you start: safety and prep
A little prep makes the cleaning faster and protects your lungs, skin, and surfaces. Plan on 30 to 60 minutes total, depending on how much grout you are tackling and how stubborn the staining is.
Quick prep checklist
- Turn on the bathroom fan and open a window if you have one.
- Wear gloves. If you are sensitive to odors or using bleach, add a mask.
- Remove bottles, bath toys, and fabric items from the area.
- Rinse the tile and grout with warm water to loosen surface dirt.
- Test your chosen method in a small, hidden spot first.
What not to mix (important)
- Do not mix bleach with vinegar or any acid. That can create dangerous fumes.
- Do not mix bleach with ammonia (including some glass cleaners).
- If you are switching products, rinse thoroughly and dry before trying the next method.
Choose your method (what works best for grout mildew)
The “best” grout mildew remover depends on three things: how heavy the growth is, whether the grout is stained, and what your tile is made of. If you have natural stone (marble, travertine, limestone), avoid acidic cleaners like vinegar and choose gentler options.
| Method | Best for | Pros | Cons and cautions | Typical dwell time |
|---|---|---|---|---|
| Dish soap + warm water (pre-clean) | Removing soap scum before treating mildew | Safe for most surfaces, improves results of any next step | Will not kill or lift embedded growth by itself | 2 to 5 minutes |
| Hydrogen peroxide (3%) | Light to moderate mildew and brightening grout | Low odor, generally tile-friendly, good first “real” step | May need repeat rounds on older staining | 10 to 15 minutes |
| Oxygen bleach (powder) | Moderate to heavy staining, larger areas | Strong stain-lifting, less harsh smell than chlorine bleach | Needs time to work; can lighten some colored grout | 15 to 30 minutes |
| Chlorine bleach (diluted) | Stubborn mildew on white grout, fast “shock” treatment | Works quickly, visibly whitens | Strong fumes, can weaken grout over time, not ideal for frequent use | 5 to 10 minutes |
| Steam cleaning | Deep cleaning without chemicals; maintenance after treatment | Great for crevices, reduces chemical use | Still needs wiping and drying; stubborn staining may need pre-treatment | Slow passes, 30 to 60 seconds per section |
Step-by-step: how to remove mildew from tile grout
The biggest mistake people make is skipping the pre-clean and rushing the dwell time. Grout needs both: a clean surface so your treatment can reach the mildew, and enough time so the cleaner can do the heavy lifting before you scrub.
Step 1: Pre-clean to remove soap scum
- Mix a few drops of dish soap in warm water.
- Wipe or scrub the tile and grout with a soft brush or sponge.
- Rinse with warm water.
- Dry the area with a towel (this helps the next product stay concentrated instead of getting diluted).
Step 2: Choose one treatment and do a full round
Pick one of the options below and stick with it for a round before switching. Switching too quickly can waste time and increases the odds of accidentally mixing products.
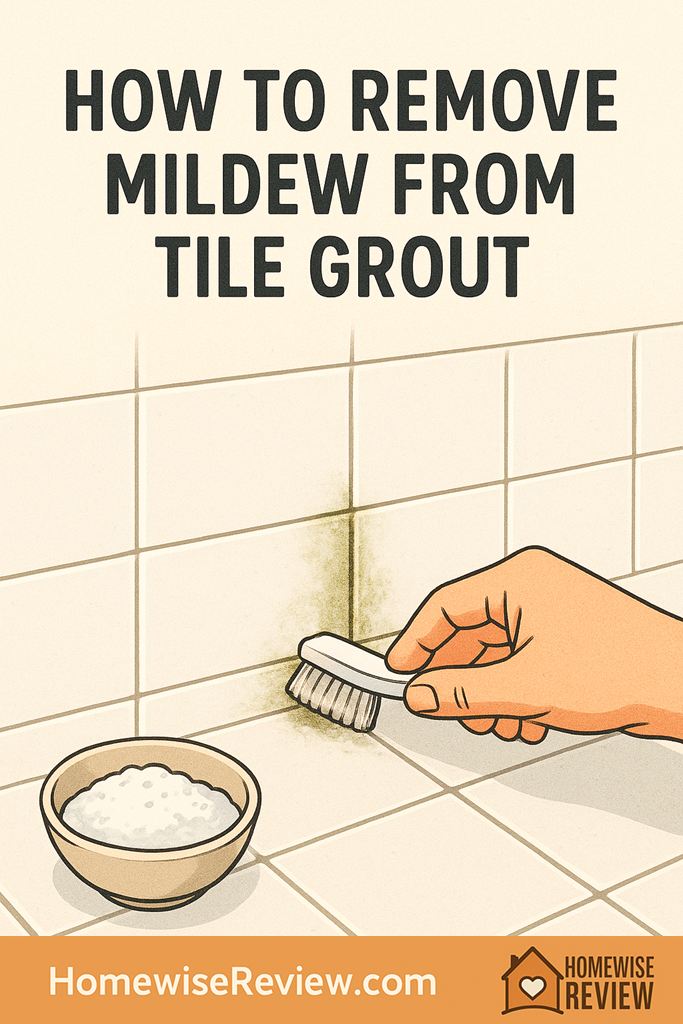
Option A: Hydrogen peroxide + baking soda paste (great starting point)
- Make a paste: Sprinkle baking soda along the grout lines, then drizzle 3% hydrogen peroxide until it forms a thick paste.
- Apply: Press the paste into the grout so it sits on top, not just on the tile.
- Let it dwell: 10 to 15 minutes.
- Scrub: Use a grout brush or old toothbrush in small circles.
- Rinse: Warm water rinse, then wipe dry.
Tip: If the paste starts drying too fast, lightly mist it with a little more peroxide to keep it active.
Option B: Oxygen bleach soak (best for widespread dingy grout)
- Mix: Dissolve oxygen bleach powder in warm water per the label directions.
- Apply: Pour or sponge it onto grout lines. For vertical shower walls, soak paper towels in the solution and press them onto the grout to keep it wet.
- Let it dwell: 15 to 30 minutes, keeping the grout damp with solution.
- Scrub: Use a grout brush with light to medium pressure.
- Rinse well: Rinse twice if needed, then towel dry.
Tip: Oxygen bleach is often the sweet spot when peroxide is not enough but you want to avoid the harshness of chlorine bleach.
Option C: Vinegar spray (only for certain surfaces, light mildew)
- Do not use vinegar on natural stone (marble, limestone, travertine) because acid can etch the surface.
- Spray white vinegar directly onto the grout.
- Let it dwell for 10 minutes.
- Scrub gently, rinse thoroughly, and dry.
Reality check: Vinegar can help with mild mildew and mineral buildup, but it is not always the best choice for deeply stained grout. If you are not seeing improvement after one round, move to peroxide or oxygen bleach.
Option D: Diluted bleach (for stubborn mildew on white grout)
- Ventilate well and keep kids and pets out of the room until everything is rinsed and dry.
- Mix: Use a diluted bleach solution (follow the bleach label; for many household bleaches this is often around 1/3 cup per gallon of water for cleaning, but always defer to your product’s instructions).
- Apply: Use a sponge, small brush, or cotton swabs for tight lines.
- Let it dwell: 5 to 10 minutes. Do not let it dry on the surface.
- Scrub lightly: A little agitation is enough when bleach is working.
- Rinse repeatedly: Rinse at least twice, then towel dry.
Use bleach sparingly: Frequent bleach use can weaken grout and may make it more porous over time, which encourages future staining.
Option E: Steam clean (excellent follow-up and maintenance)
- Work in small sections so you can wipe immediately after steaming.
- Hold the nozzle close enough to concentrate steam on the grout, not just the tile face.
- Make slow passes, then wipe with a clean microfiber cloth.
- Finish by towel drying the grout lines to remove loosened residue.
Steam is especially helpful after you have already treated mildew, because it lifts leftover grime that can feed regrowth.
Step 3: Rinse, dry, and repeat only where needed
- Rinse thoroughly to remove cleaner residue that can attract dirt later.
- Dry completely: Use a towel, then run the fan for 20 to 30 minutes.
- Spot-repeat: If 80% of the grout looks better, only re-treat the worst 20% rather than starting over everywhere.
If it still looks bad: mildew vs. permanent discoloration
Sometimes what looks like mildew is actually staining, grout wear, or discoloration locked into older grout. The fix changes depending on what you are seeing.
Quick diagnosis guide
- If it wipes away slimy or dusty: it is likely active growth or surface grime. Treatment plus better drying should solve it.
- If it lightens while wet but returns dark when dry: that often points to staining deep in porous grout or moisture trapped behind the grout.
- If it is orange or pink: it could be bacterial buildup common in damp showers. Peroxide or oxygen bleach usually helps.
- If grout is crumbling or cracked: cleaning will not last. Plan to repair or regrout.
What to do if it is stained, not just mildewed
- Do one more round with oxygen bleach and a longer dwell time.
- Consider a grout colorant or grout pen for cosmetic refresh (after thoroughly cleaning and drying).
- If moisture is coming from behind the tile (soft wall, loose tile, persistent damp smell), pause and investigate leaks before continuing.
How to keep mildew from coming back
Removal is only half the battle. Mildew returns when moisture and residue stay on grout, so your prevention plan should focus on fast drying and less buildup.
High-impact prevention habits
- Run the fan during showers and for 20 to 30 minutes after.
- Squeegee the tile after bathing. Even 60 seconds helps.
- Towel-dry the grout line at the tub edge where water likes to sit.
- Keep the shower door or curtain open so the area can dry faster.
- Wash shower liners and mats regularly so they are not reintroducing mildew.
- Fix drips and slow leaks promptly (shower head, tub spout, toilet supply line).
A simple weekly routine (10 minutes)
- Spray tile and grout with a gentle bathroom cleaner.
- Let it sit 3 to 5 minutes, then lightly scrub the grout lines in the corners and near the tub edge.
- Rinse and dry with a towel.
In a busy house, the key is making it easy. Keeping a small grout brush and a microfiber cloth in the bathroom means you can do quick touch-ups before mildew becomes a weekend project.
Should you seal grout after removing mildew?
Sealing is not magic, but it can slow down staining and moisture absorption, especially on older cement-based grout. If your grout looks clean and fully dry, sealing can be a smart next step.
Signs your grout may need sealing
- Water darkens the grout quickly and the color stays dark for a long time.
- Grout stains easily even after regular cleaning.
- It has been more than 1 to 2 years since the last sealing (for many households).
Basic sealing tips (so it actually works)
- Let grout dry at least 24 to 48 hours after deep cleaning.
- Apply sealer carefully along the grout lines, wiping excess off tile promptly.
- Avoid getting the area wet until the sealer is fully cured (follow your product directions).
Bottom Line
To remove mildew from tile grout, start by stripping soap scum, then use peroxide or oxygen bleach with enough dwell time before you scrub. Rinse and dry thoroughly, because dryness is what keeps mildew from returning. If grout stays dark after repeated cleaning, you may be dealing with staining, failing grout, or a moisture issue that needs repair.
See also
If you want family-friendlier options, start with our best non-toxic cleaning products for mildew and use the stain-rescue decision tree when you are not sure what treatment to try next.
- Dupray Neat steam cleaner review for grout and tile
- Scrub Daddy sponges for grout scrubbing: are they worth it?
- How to remove mildew from carpet (if the damp smell spread)
Frequently Asked Questions ▾
What kills mildew in grout the fastest?
For speed on white grout, diluted chlorine bleach works quickly with a short dwell time (often 5 to 10 minutes). For a strong but generally less harsh approach, oxygen bleach is very effective, especially when you can keep the grout wet long enough for it to work.
Does vinegar remove mildew from tile grout?
Vinegar can help with light mildew and some mineral buildup on ceramic or porcelain tile, but it is not always strong enough for older staining. Avoid vinegar on natural stone, and never combine vinegar with bleach.
How long should I let hydrogen peroxide sit on grout?
A good starting point is 10 to 15 minutes, keeping the area damp so it stays active. If you are using a peroxide and baking soda paste, you can often see improvement after one round, then spot-repeat where needed.
Why is my grout still dark after I cleaned it?
It may be permanent discoloration in porous grout, leftover moisture trapped in the grout, or staining below the surface. If the grout darkens immediately when wet and stays dark for a long time, focus on drying, improving ventilation, and consider sealing once the grout is fully clean and dry.
How do I keep mildew from coming back in the shower?
Prioritize drying: run the fan long enough, squeegee water off tile, and towel-dry the tub edge where water sits. Weekly light cleaning prevents soap scum buildup, which makes it much harder for mildew to take hold.
As an Amazon Associate, we earn from qualifying purchases made through links on our site.